Originally published on 2016-08-31. Updated on 2017-07-11. Updated on 2018-07-03.
File this under the category of ‘Notes for my future self so I don’t have to figure this all out from scratch again’. Hopefully it will be useful for someone trying to do a similar thing.
I was trying to set up pass, an open source password manager, exactly the way I wanted it:
- gpg-agent should remember my master password until I put my computer to sleep, even between two different terminal sessions.
- a hotkey to search (with autocomplete) through the available accounts and put the password on my clipboard.
Really those don’t seem like such tough requests. Here’s what I did.
- Install pass with
brew install pass. Nothing too complicated here. Add some passwords so you can test out the other steps. - Install GPG with
brew install gnupg. It’s important to get GNU 2.1 or higher, but that’s now the default. (We need at least version 2.1 because that is when--use-standard-socketbegan to default to true. - Edit your
~/.gnupg/gpg-agent.conf(create that file if it doesn’t already exist) to include the linemax-cache-ttl 7200. Choose a number of seconds that works for you. After that much time has elapsed, gpg-agent will forget your master password. - Install sleepwatcher with
brew install sleepwatcher. Sleepwatcher will let us run a script when the computer goes to sleep and when it first wakes up.- Create your ‘on sleep’ script by creating a file at
~/.sleepcontaining just one line:echo RELOADAGENT | /usr/local/bin/gpg-connect-agent. Make sure the file is executable by runningchmod 0700 ~/.sleep. - Run
brew services start sleepwatcher. This is a replacement forlaunchctl load ...that you may see on other tutorials. If you change your~/.sleepor~/.wakeupscripts, you may need to runbrew services restart sleepwatcherfor the change to take effect.
- Create your ‘on sleep’ script by creating a file at
At this point, you could call it quits. The instructions so far are sufficient to avoid typing your master password more often than necessary. The rest of the instructions cover how to get the hotkey and autocomplete behavior, like 1Password has.
- Install Alfred if you don’t already have it. We’re going to use CGenie/alfred-pass to get the hotkey and autocomplete behavior. It’s a custom Alfred workflow, so you’ll need to spring for the paid version.
- Install pinentry-mac with
brew install pinentry-mac. Configure gpg-agent to use this for entering your master password by adding the linepinentry-program /usr/local/bin/pinentry-macto your~/.gnupg/gpg-agent.conf. You’ll have to restart gpg-agent for this to take effect:killall gpg-agent. - Install CGenie/afred-pass.
- From the Alfred preferences, go to workflows. Right click on ‘pass’ and go to open in finder. Open up
pass-show.shin a text editor.- Because we’re using gpg 2.1 or higher, we can comment out the whole section labeled
GPG Agent— the if-statement and envfile bit. - Comment out the line at the bottom that says
pass show -c $QUERYby putting a#at the front. I found that using thepass -cflag meant I could only get one password every 45 seconds — I had to wait untilpasscleared my clipboard for some reason. - Uncomment the line above it and remove
| pbcopyfrom the end. That is, change it from#pass show $QUERY | awk 'BEGIN{ORS=""} {print; exit}' | pbcopytopass show $QUERY | awk 'BEGIN{ORS=""} {print; exit}'. We’re doing this because one of the coolest features of Alfred is clipboard history, but usingpbcopythis way puts your passwords into that history, where they could be snooped. That’s no good! We’ll get Alfred to put it on your clipboard but not your history in the next step. - In the previous step, we modified the script to echo your password to stdout instead of putting it on the clipboard. Now, right click on the workflow screen in Alfred, choose Outputs > Copy to Clipboard.
- Because we’re using gpg 2.1 or higher, we can comment out the whole section labeled
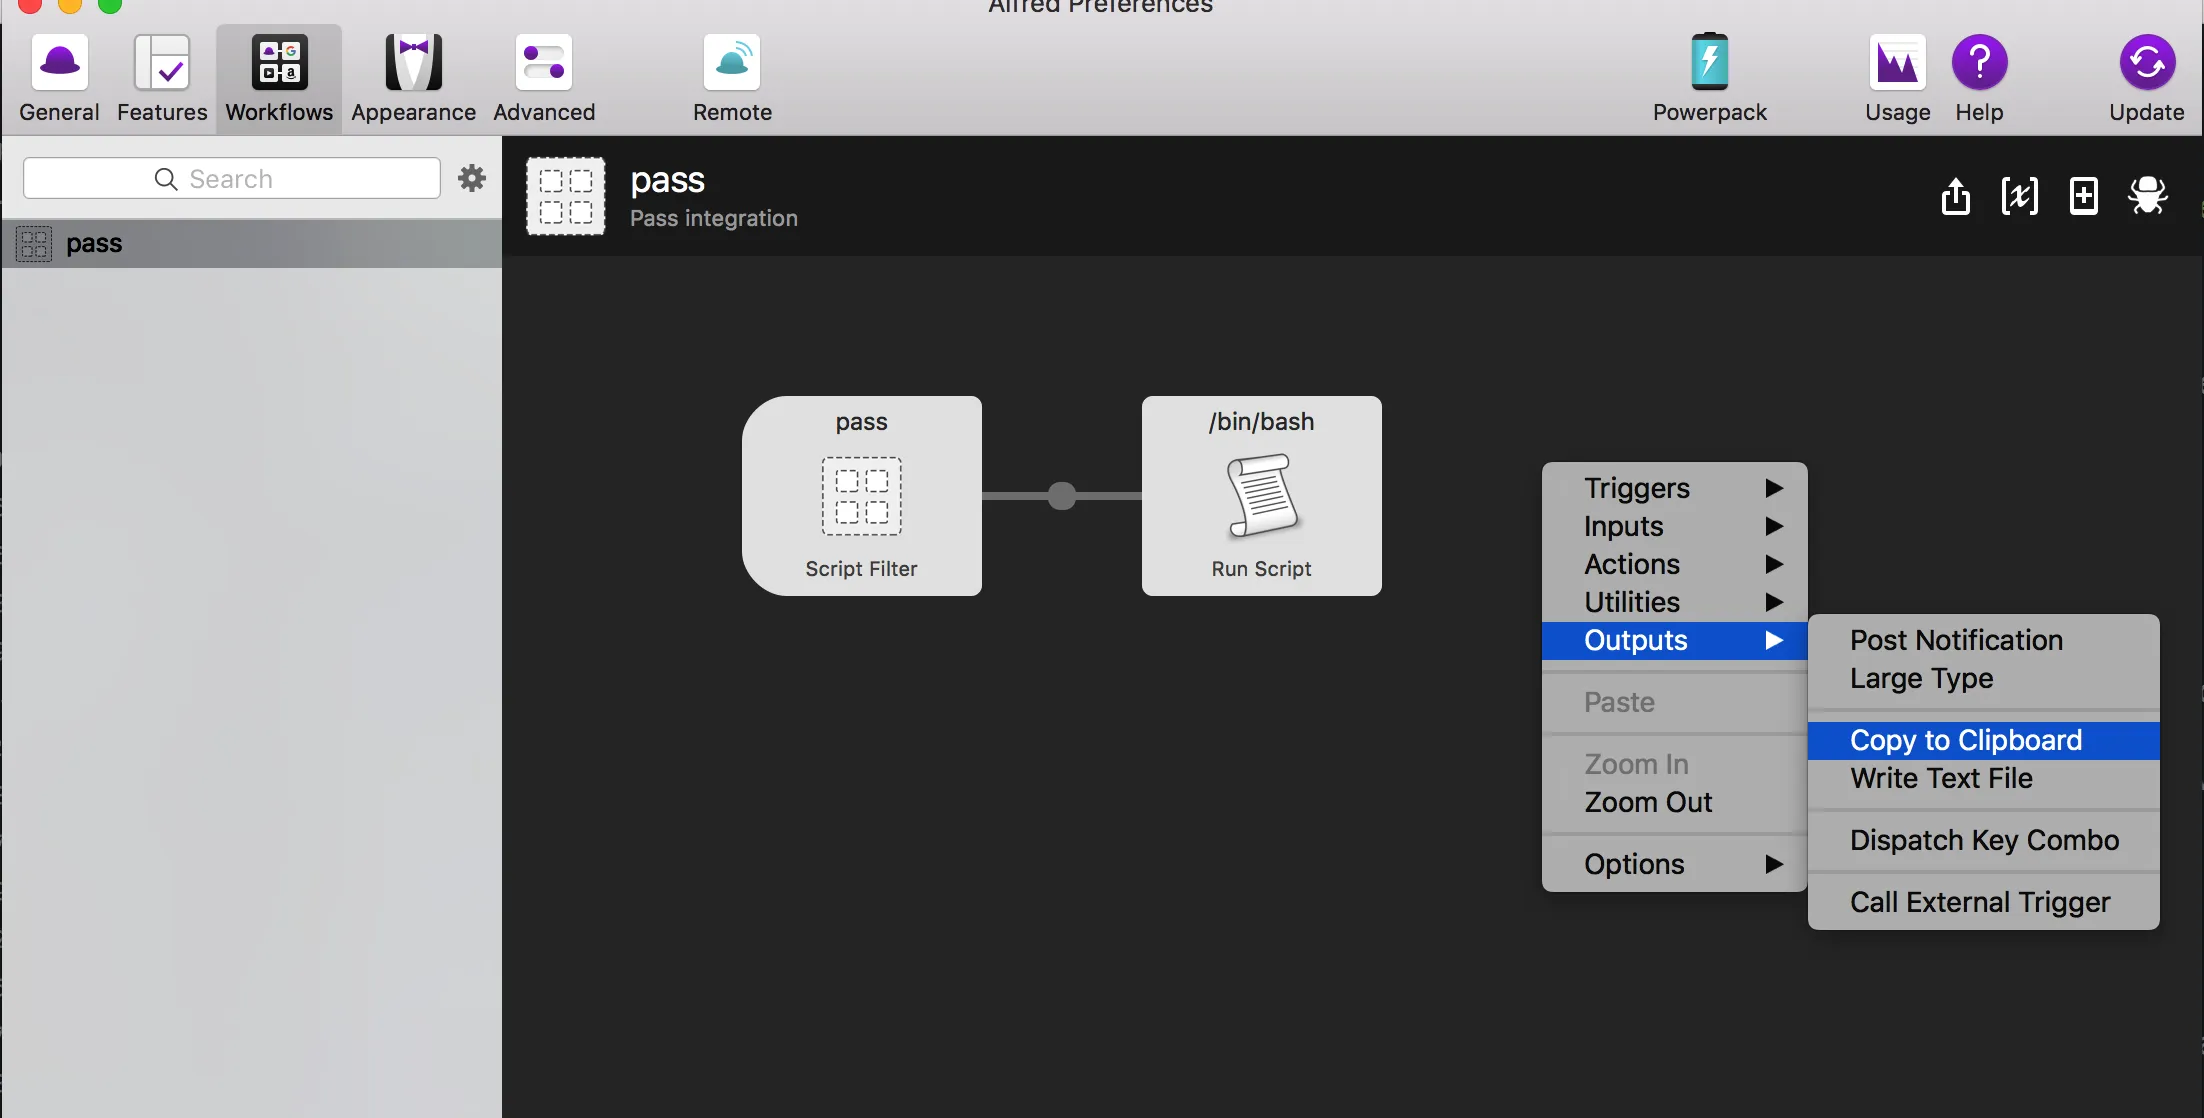
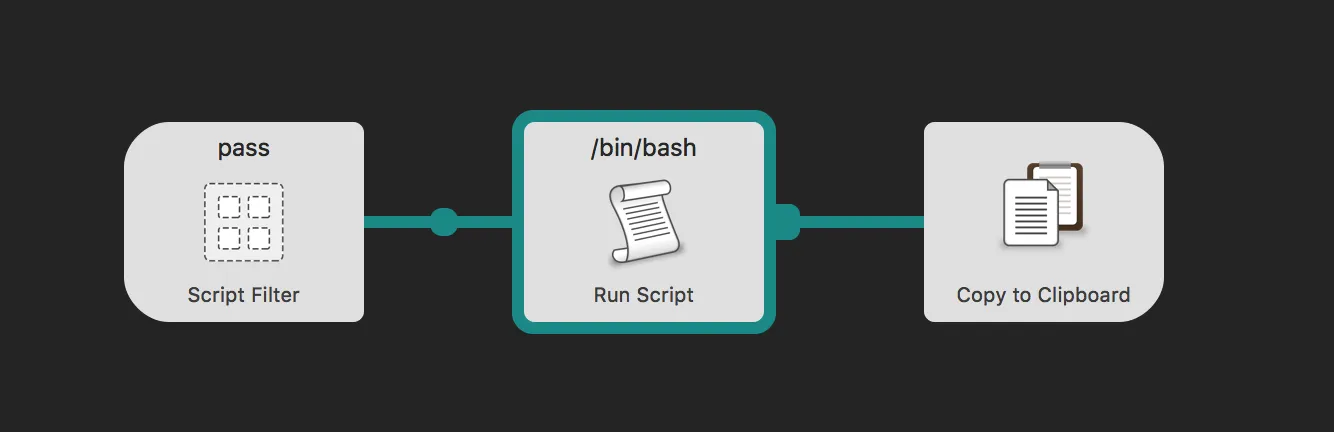
Check the box for ‘Mark item as transient in Clipboard’ and save. Drag the little nubbin on the right of the ‘run script’ box to the new clipboard box. It should look like this when you’re done.
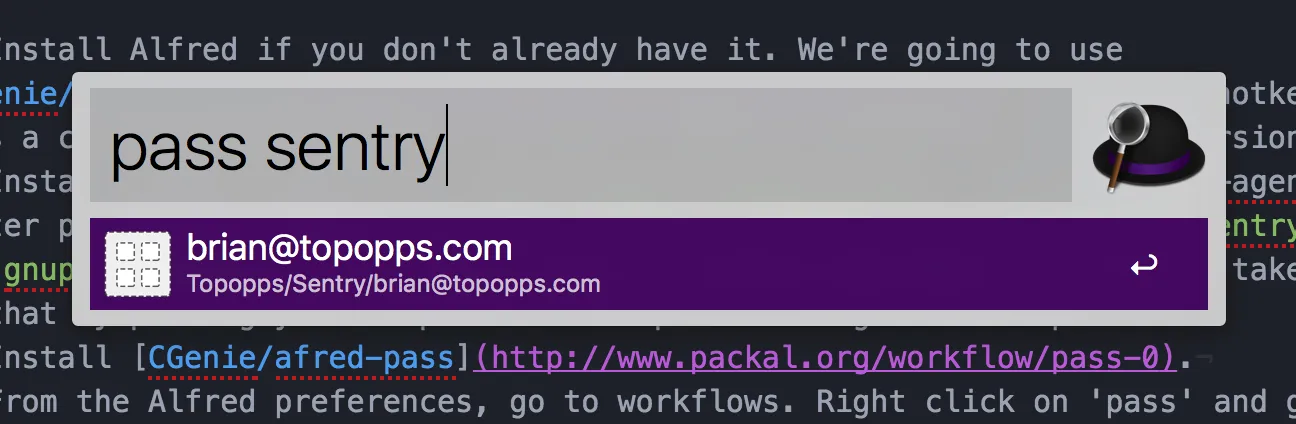
And we’re done. Now you can bring up Alfred with your hotkey, type pass, and you’ll have autocompleted passwords on your clipboard, but not your clipboard history.
We’ve reached another good stopping point. However, my last little nitpick is that I don’t love the pinentry-mac program when I’m using pass at the command line. It’s necessary for alfred, since there’s no terminal where I could be typing my master password. But I find it’s slower than the ncurses based default.
My method is based on this Stack Overflow post: Change pinentry program temporarily with gpg-agent. We’ll make a wrapper program that hands off to one of two pinentrys. Here’s what mine looks like:
#!/bin/bash
# choose pinentry depending on PINENTRY_USER_DATA
# requires pinentry-curses and pinentry-mac
# this *only works* with gpg 2
# see https://bugs.debian.org/cgi-bin/bugreport.cgi?bug=802020

case $PINENTRY_USER_DATA in
gui)
  exec pinentry-mac "$@"
  ;;
*)
  exec pinentry "$@"
esac
Save this to somewhere on your PATH and make it executable. I called mine ~/bin/my-pinentry. Now edit pass-show.sh above to pass the right environment variable:
#!/bin/bash

set -e

QUERY=$1
PATH=/usr/local/bin:$PATH

PINENTRY_USER_DATA=gui pass show "$QUERY" | awk 'BEGIN{ORS=""} {print; exit}'
This way, we get to use the (faster) ncurses pinentry in the terminal, and the GUI version when necessary.